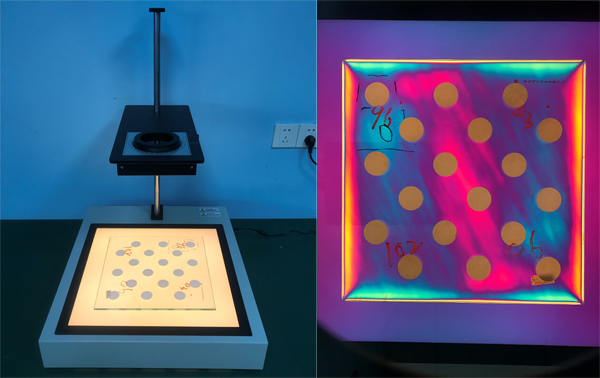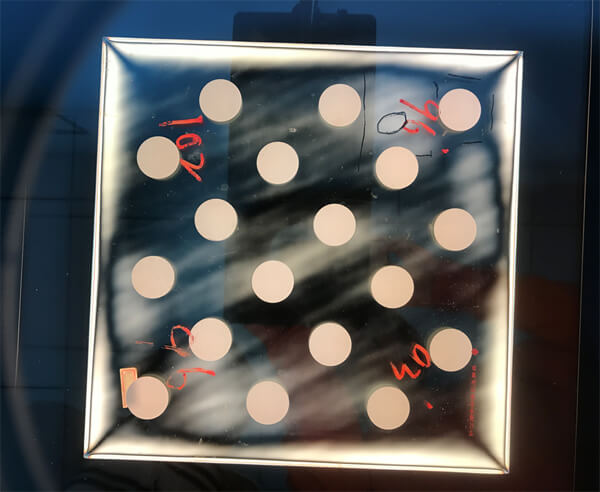
The method of observing residual stress in glass by orthogonal polarized light is well known, and it is widely used to determine the stress in glass qualitatively or semi-quantitatively. The simplest stress meter usually consists of a white light source and two polarizers. The optical axes of the polarizers are perpendicular to each other. The glass sample is placed between the two polarizers. The direction of the principal stress is 45 degrees to the polarization axis. If there is a non-uniform stress perpendicular to the direction of light propagation in the glass, black, gray and white interference bands can be observed, and when the stress is higher, yellow, red and blue interference fringes can be seen. Only a uniform dark field can be observed in a stress-free glass.
For annealed glass products, only gray and white interference colors generally appear. At this time, in order to improve the resolution, a sensitive color film needs to be added. The sensitive color film is actually an artificial birefringent film with an optical path difference of 565 nm, which is equivalent to artificially increasing or decreasing the total optical path difference by 565 nm, so that color interference colors appear in the field of view, and the resolution ability of the naked eye to interference colors is improved.

The stress detection instrument of this method is that the polarization direction of the polarizer and the analyzer must be 45 degrees with the horizontal line, and they must be perpendicular to each other. The direction of one of the principal stresses of the sample to be tested must be consistent with the horizontal line, that is, the direction of the principal stress must be 45 degrees from the direction of polarization, if the sample is a cylindrical product such as a bottle.The bottle is placed horizontally, and the axis of the bottle coincides with the horizontal line.
The analyzer can be rotated, and the rotation angle is indicated by the scale. When using, first turn the analyzer to 0 scale, and then place the sample to be measured. Adjust the direction of the sample so that the direction of the principal stress at the measured point forms an angle of 45 degrees with the polarization direction, and then rotate the analyzer. , until the measured point becomes the darkest; note the angle reading Each degree corresponds to an optical path difference of 3.14 nm.
Compressive stress or tensile stress can be judged according to the direction of rotation. If the measured point can be darkened by rotating the analyzer clockwise, it is tensile stress, otherwise it is compressive stress. It should be pointed out that if the quarter-wave plate is installed by rotating 90 degrees, the nature of the stress represented by the rotation direction of the analyzer is just the opposite, and the absolute value of the reading remains unchanged. If you have questions about the instrument, 25 X 200mm plate glass can be used to measure the plate core stress. It is known that the plate core stress is tensile stress, so it can be used to verify the stress test direction of the instrument.
The accuracy of the quarter-wave plate has a great influence on the measurement accuracy of this method, and the optical path error of the quarter-wave plate is generally required to be within +/-2 nm. The Senarmont method is applicable to the determination of glass products with known stress direction, such as flat glass, bottles, glass tubes, etc.