The equipment is designed to observe the internal stress presence and stress distribution in transparent glass and plastic materials by displaying different color patterns. This allows users to intuitively analyze the internal stress conditions and further assess the internal quality of the products.
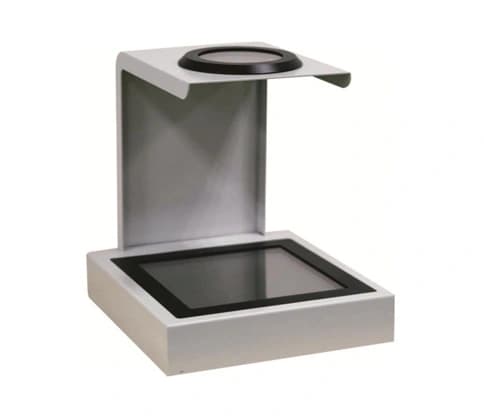
1. Premium Performance: Imported optical components to display high-quality stress patterns.
2. Ease of Use: Designed for simple operation, enable all users to operate it professionally with simple training.
3. Real-Time Display: Provides immediate visualization of stress presence and distribution.
4. Durability: Built with long service life, ensuring reliable performance over time.
5. Versatile Applications: Ideal for inspecting glass, plastic, crystals, and many other new materials.
Model No. | PSV-202 |
Retardation of full-wave plate | 560nm |
Polarizer | 200mm*200mm |
Analyzer | Diameter 100mm |
Measuring height | 236mm |
Overall size | 310*285*350mm |
Net weight | 8KG |
Voltage | 24VDC( equipped with AC/DC adaptor) |
Light source | White LED |
The equipment utilizes linear polarized light to qualitatively observe and analyze the birefringence and stress within transparent products. This method allows for the visualization of stress patterns, which can be critical for quality control and material analysis. Additionally, the Senarmont compensation method is employed to achieve precise measurements of the rotating angle, glass temper number, and optical retardation and calculate the stress value of the sample. This technique involves the use of a quarter-wave plate and an analyzer to determine the phase shift caused by internal stress. This combination of qualitative and quantitative analysis ensures a comprehensive understanding of the residual stress .
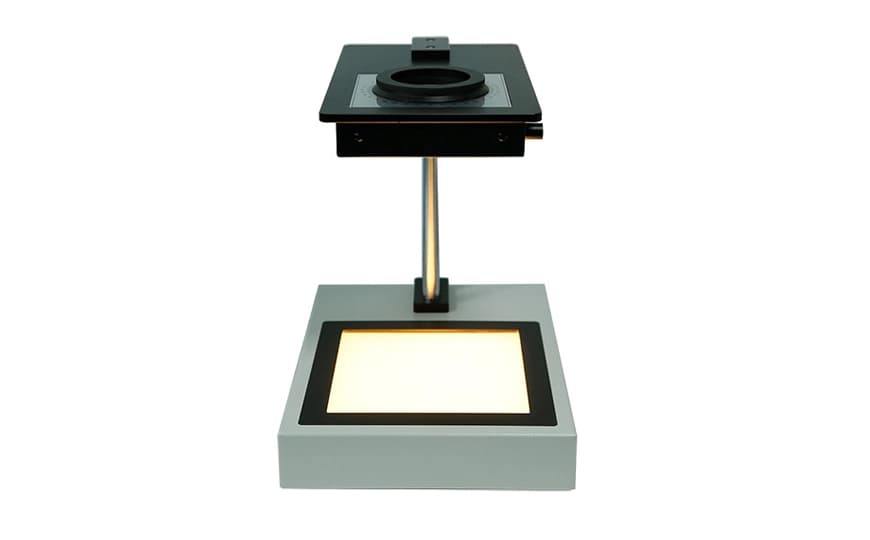
1. Real-Time Display: Provides immediate visualization of stress presence.
2. Cost-Effective Measurement: Affordable measurement of glass temper grade, rotating angle and optical retardation.
3. Comprehensive Stress Analysis: detects stress presence and distribution effectively and measures stress-related values.
Model No. | PSV-413 |
Analyzer | Diameter 78mm |
Viewing field | 200×200mm |
Measuring range | 0-280nm |
Measure height | Max 259mm |
Light source | White LED light |
Overall size | W280×D385×H390mm |
Net weight | 11Kg |
Detecting method | Sensitive Color + Senarmont |
Retardation of full-wave plate | 560nm |
Voltage | 24VDC( with a AC/DC adaptor ) |
The PET Preform Strain Viewer is a specialized optical testing instrument used primarily in the quality control process of plastic manufacturing, particularly for PET preforms. It facilitates operators to observe crystallization and other common defects which are invisible under natural light. Residual stress in injection molding products can also detected. It has been widely used in the quality control of various plastic rough processing products and finished products.
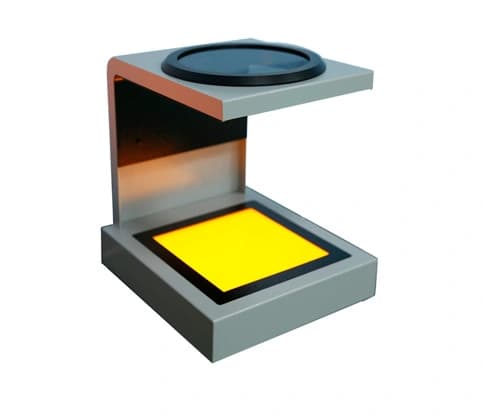
1. Visual identification of crystallization and other common defects:
The crystallization and other defects of PET preform can be visually identified. This is crucial because crystallization can affect the clarity, strength, and overall quality of the final product.
2. Proactive solutions for preform defects:
The equipment provides 12 common defect analysis chart, and puts forward improving solutions to specific defects in the production process.
3. Residual Stress Analysis:
The instrument can detect residual stress within the injection-molded products. Residual stress can lead to warping, cracking, or other structural failures in the final product. So identifying and eliminating these stress is essential for ensuring product quality.
Model No. | PSV-801 |
| Top analyzer | Diameter 200mm |
| Viewing field | 200*200 mm |
| Measuring space height | 234 mm |
| Light source | LED (White and Yellow light) |
| Net weight | 10KG |
| Overall size | 300*335*330 mm |
| Voltage | 24VDC(with a AC/DC adaptor) |
This device is used to measure the birefringence in transparent materials, which is a phenomenon where a material splits a ray of light into two rays when it passes through, each traveling at different speeds. This birefringence is often related to internal stress within the material.
The polarimeter automatically detects the retardation (the phase difference between the two rays) and the direction of the slow axis (the direction in which the light travels slower). This is typically done using image processing algorithms that analyze the patterns of light and dark fringes created by the birefringence.
The captured images are sent to a computer, which processes the data in real time. The software calculates the stress values and the orientation of the slow axis across the entire viewing field. The results are displayed on a screen, showing a real-time map of the stress distribution and the slow axis direction within the sample.
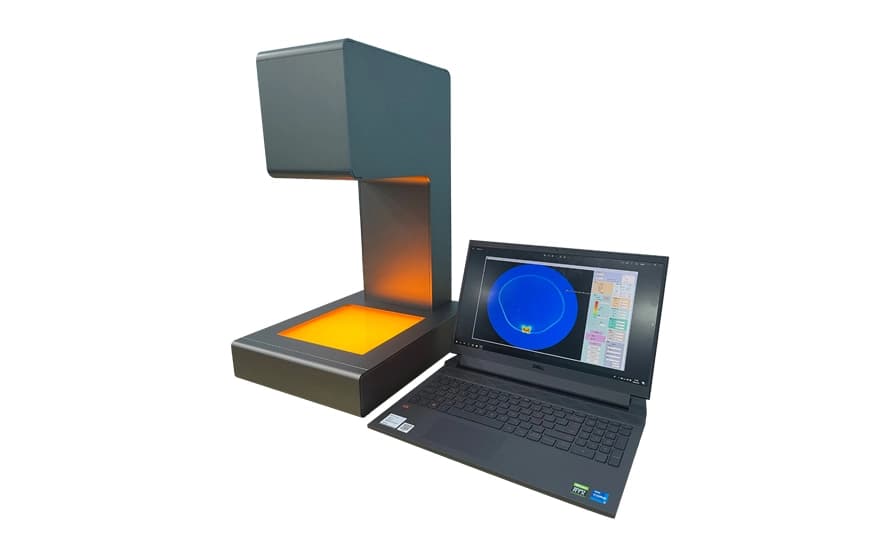
1. One-key automatic stress measurement within the whole viewing field;
2. Under high-speed mode, a single measurement can be finished in 15s;
3. When moving the cursor, it will automatically display stress retardation at the point of the cursor;
4. Strong testing results storage functions
① entire stress image within viewing field ( with color scale)
② 3D stress image within viewing field
③ Selected area stress image
④ zooming with area stress image
5. Eliminating environment interference with background calibration
Model No. | NMV-145 |
| Viewing field size | 175*175mm |
| Measuring space height | 278mm |
| Retardation range | 0-145nm |
| Detection method | rotating analyzer method |
| Setting wavelength | 590nm |
| Repeated measurement accuracy | ±1nm |
| Effective pixels | 1100*1100 |
| Overall size | 365(L)*285(W)*577(H)mm |
| Net weight | about 20kg |
| Light source | high brightness LED |
| Power supply | AC 100~240V 50/60Hz 0.35A |
| Support system | Windows10 |
| Use environment | indoor use |
This automatic equipment is designed with core acoustic microscope, automatic loading, unloading and intelligent detection algorithm. Among them, the microscope uses multiple probes to scan multiple products in parallel. It can clearly display the structure of multiple layers on the surface and inside of the product at the same time. Moreover, it intelligently analyzes the image of each layer to automatically identify, locate the defect position and mark on the back of the product.
This Scanning Acoustic Tomography utilizes intelligent formula mode to manage the parameter configuration of different products. It realizes the functions of quick file building and one-key switching, and greatly facilitates equipment operation.
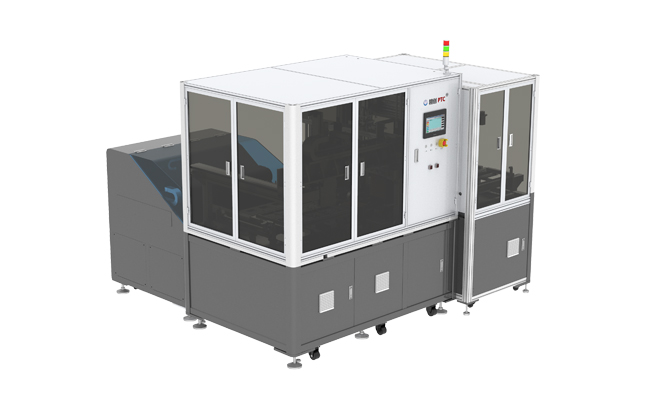
1. Multi-probe parallel scanning, fast scanning speed and high efficiency;
2. Intelligently analyze the scanned image, automatically locate the defects, and mark or sort NG products;
3. Intelligent formula mode to scan and detect different types of products with different specifications;
4. Can be equipped with automatic loading and unloading machine to realize the automatic process of loading, scanning, inspecting and unloading;
5. Can be customized and designed according to customer requirements;
Model No. | DE-U |
Function | Bubbles between material coatings, cracks, voids and delamination inside the material |
Detection rate | ≥99.9% (resolution 0.28mm) |
Detection accuracy | Min 0.1mm |
Detection speed | 1200mm/s (scanning speed) |
Overall size | Loading and unloading machine: L3550*W2570*H2000mm Inspection unit: L1450*W1100*H1300mm |
Overall weight | About 2000Kg |
Rated input voltage | AC220V ±5%, 50HZ± 2% |
Rated current | 20A |
Total power consumption | ≦4.5KW |
Direct Imaging Equipment represents a significant advancement in the screen printing plate-making process. Unlike traditional exposure methods that require film, it utilizes violet laser technology to expose images directly onto the printed material surface. This technology incorporates Digital Micromirror Device (DMD) core components from Texas Instruments (TI), high-power 405nm laser modules, and high-precision motion systems.
Traditional exposure process can suffer from alignment deviations and image distortions. However, this advanced equipment ensures precise alignment and high-quality image reproduction, thereby improving the overall quality of the printed materials.Meanwhile, this equipment is adaptable to various printing applications, including labels, textiles, and other materials. This versatility makes it a valuable tool across different sectors within the printing industry.
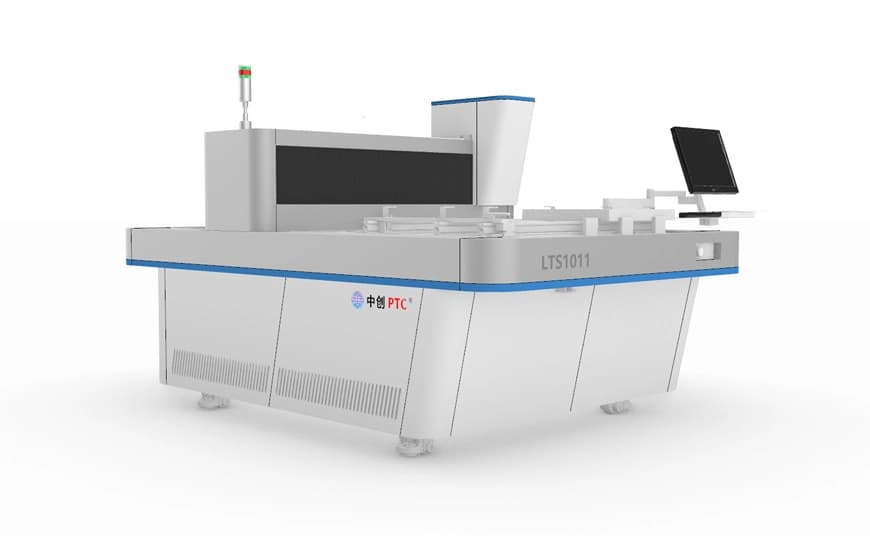
1. High resolution
1270dpi /2540dpi (optional ), 133 LPI
2. High efficiency
3 minutes to expose a 1000mm*1000mm screen;
Precise exposure alignment to greatly saves preparation time, reduces labor and saves time.
3. Low cost
Adopting DMD direct imaging technology, there is no need for film. There are no quality problems caused by film wear and unstable expansion and contraction. The three steps of traditional film exposure are shortened into one step of laser direct plate making, achieving the purpose of fast, accurate and low-cost plate making.
Model No. | LTS1011 | |
Max frame dimension | 1100 mm*1100 mm | |
Min frame dimension | 400mm*400mm | |
Max exposure area | 1000mm*1000mm | |
Frame thickness (can be customized) | 25-45mm | |
Imaging System Technology | DMD DLP Technology | |
Emulsion thickness (EOM) | solvent type sensitive emulsion: 3μm-160μm, water type sensitive emulsion: 3μm-240μm | |
Exposure time | 160-200S/m2( film thickness12-15um ) 200-240S/m2 (film thickness 20-25um) SBQ type photosensitive emulsion | |
Resolution | 1270dpi/2540dpi (optional), 12700dpi (for PCB) | |
Line number per inch | 133LPI | |
Focusing method | dynamic real-time focusing | |
File format | Gerber274x, 1-Bit-Tiff | |
Laser type | UV laser, wavelength 405±5nm | |
Laser power | 20W/25W/30W(optional) | |
Dimension | 2680 mm*1580 mm*1500 mm | |
Net weight | about 2200KG | |
Working environment | yellow light room; clean-room level: 10000 | |
Power electricity, air pressure | single-phase 220V, 50/60HZ, 4KW, air 1L/min | |